To wash or not to wash, that is the question!

IMG_20160124_105853823IMG_20160124_105846018 new
I’m finally done digging out from Jonah!
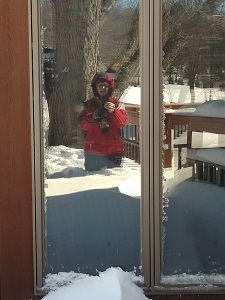
That’s me thigh high in snow taking a reflection selfie by our deck on Sunday.  I was trying to beat a path to the back door to free it from the snow 28″ of snow we got!  We had drifts against the house and doors of up to 5 feet!

That was our only snow so far this winter.  Of course I was scheduled to teach a class that day.  Fortunately, we already had a snow make-update set up for this weekend.  I’m hoping that we’re done with snow now!


OK, so let’s get started with Tips & Techniques from my College of Continuous Quilting Improvement (CCQI) Workshop!

Quilters seem to be divided into 2 camps:  “I never pre-wash my fabrics.”  and “I always pre-wash my fabrics.”  Except for small projects that will be completed quickly, do not require precision or that I know will never be washed, I belong squarely in the “pre-wash” camp for a couple of reasons.

Fabric is dirty and can be smelly.  The mills where the fabric is produced are not “clean-room” environments.  There’s no telling what’s been roaming around those factories.  If you have ever worked in a fabric store, at the end of the day you’ll notice that your hands feel dirty and might smell a little funny.  This is from all of the different chemicals and dyes used to make the fabric.  Do you really want to be spending a lot of time handling fabric like that?  I don’t!

Fabric is often over-dyed and can bleed when wet.  I’m sure you’ve heard at least one story where a quilter cried after spending countless hours on a quilt only to have the dark colored fabric bleed all over the lighter colored fabrics.  Maybe it has happened to you?  Of course, you can always throw one of those dye catchers in with the quilt and say a little prayer.  But wouldn’t you rather know that the possibility exists or you had the chance to minimize the risk before it had a chance to ruin your creation? I would!

Some fabrics come from the mill with a lot of sizing to give it that crisp feel, others not so much.  Some fabrics just didn’t make it onto the bolt quite right.   Have you ever tried to iron out a wrinkle or fold in the fabric that came as a result from improper rolling on the bolt?  It’s next to impossible.  Call me picky, but I want all of my fabrics to behave the same way and be as smooth as possible.  The only way I have found to even out the playing field is to start from scratch by washing it and applying my own sizing/starch.

So those are the reasons why I pre-wash my fabric.  Sure, it means I probably can’t start cutting into the fabric the minute I get home from my local quilt shop.  But I’m OK with that.  Once my fabrics are washed, it’s time to get out the starch!   I’ll talk about that next time!

Helle-May


New series starting! “No more apologies!”

I am often asked about how I get my points to be so pointy and my seams to match up so well.   Disclaimer:  As you may or may not know, I have a degree in engineering, a perfectionist seamstress mom, and a perfectionist carpenter father who passed too young.  It’s in my DNA to try to get things as “perfect” as I can.  It’s just the way I’m made – I can’t help it.  (You should have seen me at a free-form quilt workshop – I was so stressed 😉

Anyway, I know not everyone is like me, but since so many quilters bring it up – I assume some would like to know how to make their quilts just a little bit better.  As a quilt show chair for numerous guild shows, I can’t tell you how many times I’ve heard “my quilt isn’t good enough to hang”   or that other famous line “don’t look too closely at my quilt.”

I think the challenge for many quilters is that they are essentially self taught and may not have had the opportunity to learn some of the tips and techniques that would help them create a quilt that wouldn’t elicit those lines.  It’s not their fault. They pick up a pattern they have fallen in love with, hoping to exactly re-create the cover quilt.  Unfortunately a pattern may only supply the basic information for what is needed to create the finished product, but not the entire story of how to get there.  The designer probably had a lot more experience to get things just right and then stressed even more over it because it was going to be photographed for the cover!  It’s simply cost prohibitive to get all of the process information into the pattern.  Assumptions about the quilter’s skills have to be made.

CCQI tshirt logo

To solve this problem, I created a workshop a few years back called the “College of Continuous Quilting Improvement (CCQI)”  Yes it’s a nerdy title (refer back to my education!)  –  and yes my attendees have to take (and pass) a quiz, but they all graduate and receive a diploma at the end!    In every workshop, it is very gratifying to see the “Aha” moments when  quilters finally overcome what had always been a quilty struggle.

In an attempt to reach those quilters who might not have an opportunity to take my workshop, I am starting a series of blog posts where I’ll share some of my tips and techniques.  The beauty of quilting is that there is more than one way to get the same result.  I’m going to share how I do it.  If you’re struggling with a particular issue, maybe it will help and if it works for you great!  If you already have a technique that achieves the result you’re looking for.  That’s great too!  I am here to help not judge!

In the end, all that matters is that you’re happy and proud of your work.
No more apologies!

Stay tuned for CCQI Tips & Techniques – Part 1!

Happy quilting!

Helle-May

Winter Kiss

Well it looks like Mother Nature has finally decided to remind us what winter should look like! The store shelves have been empty since Wednesday night in anticipation of the big storm coming tonight/tomorrow here in NJ.

No fear! I’m sure you have plenty of fabric in your stash to keep you from getting bored! How about getting ready for Valentine’s Day? You should be snowed in for just about the right amount of time to make something to sweeten up the table!

My pattern for this little table-runner is available to download from my Craftsy site so you don’t have to worry about getting stuck in the snow!  My friends kid me that I can’t make a quilt without a star in it.  What can I say?  I love my stars!

Winter Kiss by Helle-May DesignsThe runner measures 12″ x 40″. The 4″ hearts are quickly and easily foundation-pieced and then surrounded by half square triangles and flying geese units. I had these beautiful fabrics leftover from some other projects I made for EBI Fabrics. The collection is called Winter Garden designed by Katia Hoffman.

I quilted the runner using Aurifil 50wt thread in grey and red.  You can see the quilting a bit better in this close-up. Winter Kiss detail by Helle-May Designs700Maybe while I’m snowed in I’ll work on inserting a shamrock into those stars for St. Patty’s Day!  What do you think?

Happy quilting and stay warm inside!

Helle-May