I still have a few pictures and words to add, but it’s
finally done! Have a look around! www.HelleMayDesigns.com

I still have a few pictures and words to add, but it’s
finally done! Have a look around! www.HelleMayDesigns.com
Don’t be alarmed if you don’t see my website. When it reappears it will be new and improved! Hopefully by tomorrow!
Still working out the bugs

I know I’ve been teasing for a while – but really – it’s just
about done! Hold on just a little while longer!

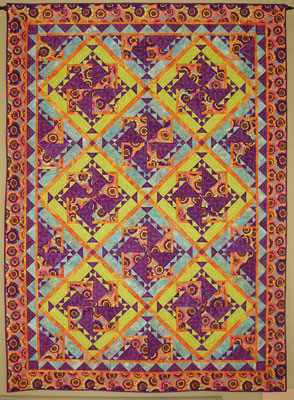
I can finally tell you about the surprise! I am so excited! My newest quilt, “Wild Daisy” will appear in the November issue of American Quilter Magazine! The article is actually the first of a 2-part series, the second of which will appear in the January issue! See this link for a preview! http://www.quiltviews.com/new-series-quilt-debuts-in-the-november-2011-issue-of-aq
The November issue should be available by the beginning of October. If you are an American Quilter Association member, you will receive your copy in the mail, if not, rush to your nearest newsstand before I buy all the copies!
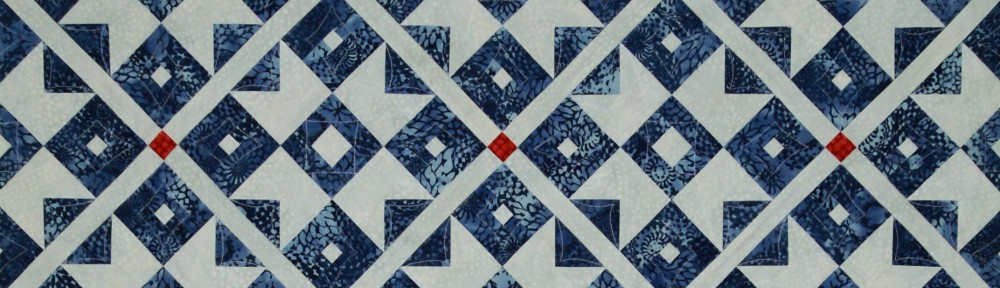
It all started when Chris Brown, editor of American Quilter Magazine spotted Driftwood in the Lancaster AQS show back in March 2010.
While I was at the show, she contacted me, eager to publish it in the magazine. Unfortunately, I had already published the pattern and so, no go. Magazines always like to be the first kid on the block to publish something!
So we talked and agreed that Driftwood would get a more colorful cousin with slightly different DNA. And so the design for Wild Daisy was born! She is quite bright in person, but the overall design and coloration kind of reminds me of a Persian rug. Does anyone else see that or is it just me?
While I was busy preparing for our not so welcome visitor, Irene, Wild Daisy was evidently even a contender in a reader poll for the cover of the magazine. However, being that she’s appearing in a November issue she lost out to a much more subdued, but beautiful winter pictorial quilt! That’s OK – I’m thrilled that she was even considered!
Don’t be afraid to show that quilt! You never know who might be looking!
Helle-May
I can’t believe my last post was in July! August is just a blur! On July 30th, we picked up my son from his first ever week of sleep away boy scout camp…later that same day, my sister-in-law got married . It was a beautiful wedding on a picture perfect day… we took the boys to Hershey Park for a long weekend…

…my son played football for a week and a half (although it was just conditioning for 3 hours every night – it threw the entire household into upheaval for that time period as it was much more work than he ever expected) … I taught a 2-part Electric Quilt for Beginners class and a QUILTapestry class at Fabric Inspirations in Englishtown, NJ… and then there were the preparations, clean-up and repairs for Irene AND then Lee! Oh yes, and the boys started school with all of its related craziness! There was more, but that gives you the highlights. Having written all that now I really remember why I don’t remember the last month!
So now it’s the middle of September and life is finally settling down and getting back to somewhat of a normal routine and I am trying to get back to quilting. I had a good jumpstart this past weekend. As program chair for my guild, I was responsible for organizing all of the activities around our guest speaker on Sunday, Karen Kay Buckley. I have long admired her work and was happy for the opportunity to learn from the master!
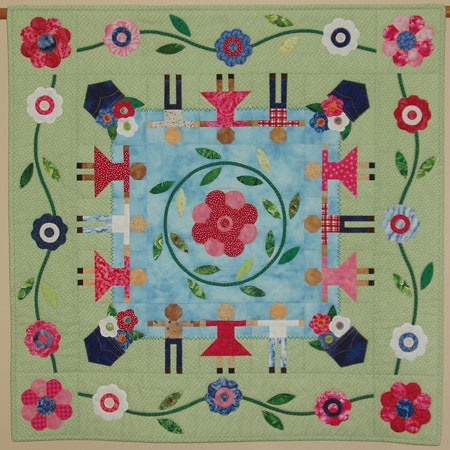
We had chosen her full day workshop, Garden Medley, to learn her secrets to beautiful hand applique. This was the second applique class I have taken, the first with Becky Goldsmith. Although piecing is my forte, I continue to want to give applique a try for all the design possibilities it opens! I have made one applique quilt in my life for a guild challenge, Ring Around the Rosie, back in 2006. No one guessed it was mine!
I even won a 2nd place ribbon for it. But truth be told, although I intended for it to be completely hand applique – as the deadline loomed – I had to quickly learn how to machine applique in order to finish on time. Ironically, the techniques I used were very similar to what we learned with Karen – but I certainly picked up quite a few more important tips. I can’t remember now whether or not I had possibly seen her on Alex Anderson’s show or read an article somewhere. In any event I am inspired to give it another try with some Estonian-influenced design ideas that just don’t lend themselves to piecing!
In any event, Karen was a great teacher. She is very organized and has lots of great information to share. I love that prior to recommending any tool or product, she thoroughly tests it herself to make sure it works. It’s also always great to hear that someone else recommends the tools you already use! I felt good about that!
Karen is famous for her Perfect Circles die cut templates (and yes – 25 of us made perfect applique circles that day!) and she has designed and sells 2 pairs of scissors with micro-serrated edges that cut fabric better than any other scissor. The blades glide through the fabric and don’t push on the fabric, creating a cleaner cut and reducing fraying
Of course the quilts she brought were stunning. I love hearing the stories and inspiration behind each quilt. So even though I had seen some of them before, it was just that much more interesting to hear about them from their maker!
Now that I am inspired, I need to get to work! I have a new quilt/pattern in the final stages and a few surprises that will be coming along shortly! Stay tuned…
Happy Quilting!
Helle-May
Did you miss the opportunity to take my QUILTapestry Workshop in the spring? Good news! I will be teaching at Fabric Inspirations in Englishtown, NJ again next month! I will be teaching a one day class (August 17) on the QUILTApestry technique as well as a 2-part class (August 16 & 23) on Electric Quilt Design Software.
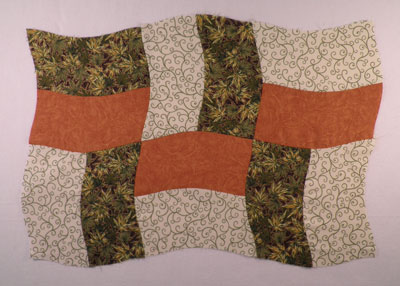
I developed the QUILTapestry technique as a way to finish a quilt when a binding is either unnecessary or unwanted, such as for a wall quilt. The top border does double duty as the rod pocket! I teach the technique by having my students bring a leftover block from another class or project, add some borders to it and then finish it with the technique to create a mini wall quilt. Everyone should go home with a finished project! No two alike! Here is one example:
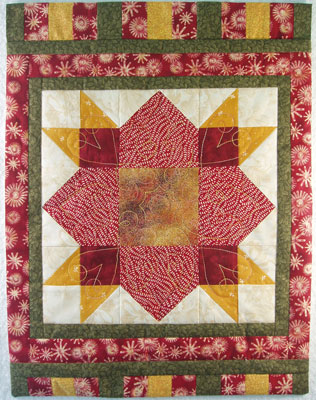
For more examples, please see my previous post QUILTapestry Class. Pick a holiday themed block and you’re on your way to getting some quick Christmas gifts finished!
The second class I will be teaching is a beginners class for Electric Quilt Design Software. This class is suitable for anyone who owns either version 6 or 7 or is possibly interested in owning the software. Have you purchased the software, but are intimidated as just where to begin – this is the class for you! For those of you still pondering the decision, I can install a free trial version that will be valid for about 2 weeks. The class will be split into 2 3-hour sessions, a week apart, so that you can digest what you have learned!
Check with the store for more information: http://www.fabric-inspirations.com/ or call 732-792-0083.
See you in class!
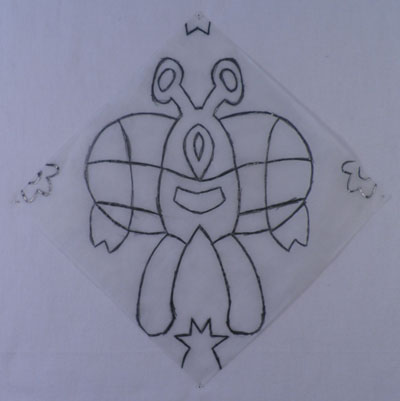
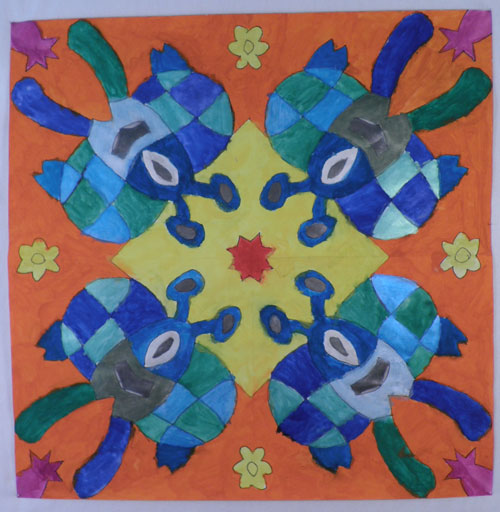
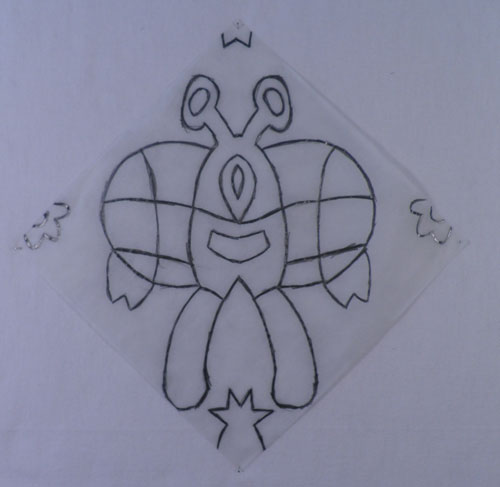
Looking at this picture evokes all kinds of ideas – a superhero bug, an alien, etc. Not sure exactly what my 11 year old was thinking when he was told to create a tracing design for a kaleidescope project in his 5th grade art class. But now look at the finished result below and tell me he’s not the son of a quilter!
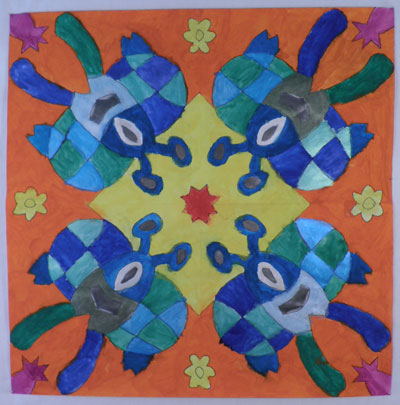
Let’s see what influences his mom has on him: a square on point in the center, “patchwork” wings (with curved seams no less! – he really liked the Flip Flop Block concept – see previous post), corner elements that tie the “blocks” together, small flower elements in between. The school district’s art program has some talented teachers that have resulted in some really neat artwork coming home – but this has to be my favorite! This one is destined for framing and possibly a quilt design! I love that my son thinks it’s cool that his mom is a quilter and love it even more that we get inspiration from each other!
Happy 4th!
Helle-May
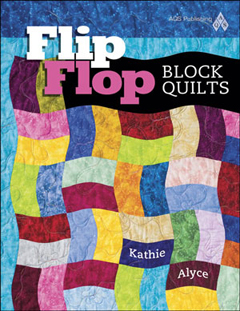
This past Sunday my local guild hosted a workshop and lecture with Kathie Alyce of Plainfield, Vermont. I was glad to have an opportunity to take a workshop and learn from someone, as opposed to working on my own projects for a change. It was a nice change of pace and quite relaxing to learn and sew a new technique without having to do all of the brainwork myself. And I have to tell you, Kathie has put quite a bit of brainwork into her technique so you don’t have to! With stunning results!
Kathie developed her “Flip Flop Block” concept almost 10 years ago after admiring many contemporary-looking art quilts at shows. She started designing beautiful landscape quilts and just loves the look of gently curving seams. She designed and sells a plastic template to easily cut out the “Flip Flop Block”. But unlike so many other templates which generally make just a couple of different quilt designs, she has designed over 40 completely different looking quilts using just this one template! So, as she would say, her Yankee practicality and ingenuity really shine through on this one! The possibilities are endless!
The workshop was geared toward learning how to use the template on some of the more basic designs to create a placemat. No big fabric commitment for this workshop – (there’s that Yankee practicality again!) – just fabric from your stash. After I finished putting together my blocks for the placement, I decided to add a few more and make it into a table runner. Here it is in the placemat stage and withoout borders.
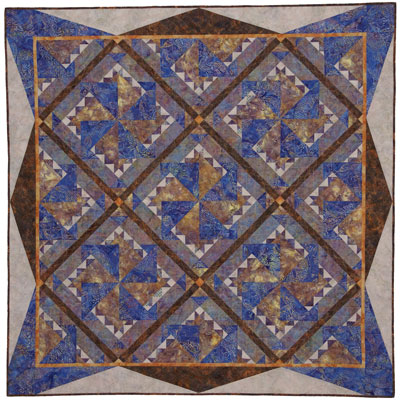
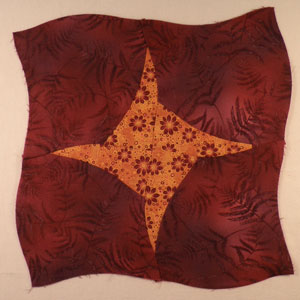
Because our class was relatively small, Kathie also allowed us to try our hand at some the additional variations. Of course, without knowing it, I picked what she deemed one of the most complex designs to try. But after a brief demonstration of how to use the template to cut my pieces, it was really no more complex than the basic pattern. Brilliant! I won’t tell, if you don’t! This design is called Stars in Motion.
In addition to individual patterns that use the Flip Flop Block, Kathie has also recently published a book with AQS which features even more patterns as well as instructions on how to add complimentary wavy borders.
Look for Kathie’s booth at most major quilt shows for a free demo or better yet, tell your guild’s program chair that it would great to host her for a workshop! You can also check out her website www.waterfallquilts.com or watch her video on Quilter’s TV www.quilterstv.com/video/1356/kathie-alyces-eye-popping-flip-flop-template-quilts.html.
Have fun with your Flip Flop Block! (Makes you think of summer, too, doesn’t it!)
Helle-May
I can’t believe it’s been more than a month since my last post. Since mid April , life has been just crazy with activity in our household – and fortunately it has all been good!
Well I guess summer has officially begun here in the northeast. After a cool and very wet spring, we have been enjoying mid-summer temperatures now for a week. Memorial Day weekend weather certainly provided a beautiful start to the summer season. The boys and I even enjoyed the community pool for a short time each day – and you know the water had to be warm for me to get in!
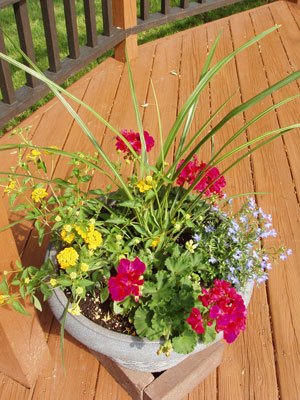
What really prompted me to write this post, however, was an incident on Saturday at my local home improvement center. Timing and weather were finally right go pick out some annual flowers to put in pots for color around the deck and house. I picked out some hot pink Geraniums, some yellow Lantana and blue Lobelia and spiky Dracena for pots on the deck. As I was trolling for more, a sales woman that was helping another customer, spied my cart and brought her customer over. “Look,” she says, “how this lady has picked flowers with varying textures and colors that compliment each other. These flowers make a great combination.” As she thanked me for being an example, I had to smile to myself as I thought that gardening and quilting are really no different! I had simply applied the same priciples I use to pick out fabrics for a quilt to pick out the flowers. As I was just about to leave, I overheard the sales woman remark about her customer’s improved selection.
I have had many people remark about the interesting color combinations and prints that I use in my quilts. Although I really love looking at beautiful flowers and plants, I don’t really consider myself a gardener. I know that many quilters are, yet so many quilters find it difficult to put colors/fabrics together for a quilt, hence the popularity of kits. Finding just the right combination is half the fun of quilting and I think nature is one of the best sources of inspiration for what works! Next time you find yourself lacking inspiration, take a walk outside, visit your local garden center or park and see what mother nature has put together! You’ll be ready to head to the nearest quilt shop!
Helle-May
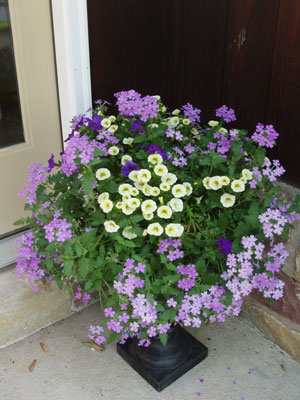
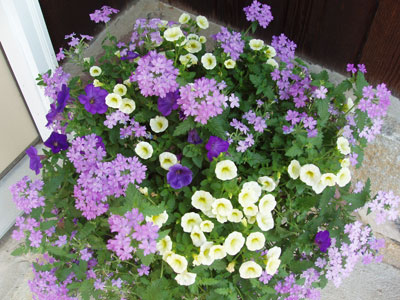
P.S. Another beautiful combination that I can not take credit for was the hanging baskets I found of a combination of Large Lilac Superbena, Royal Velvet Supertunia, with just a splash of Yellow Superbells. (The names are all Proven Winners trademarks). I don’t really have a place for hanging baskets, but found that placed on the right sized pedestal type urn – they are even more dramatic!